Hello Awesome Readers!
I hope everyone should not aware of Survey in salesforce. Although, everyone must have an idea about what is Survey?
Here, in today’s post let’s learn about the Survey. So, Survey is basically a simpler tool in Salesforce which provides the way to collects feedback and responses from customer or users about their experiences. This tool provides an easy way and out of box features and functionalities to create forms to get the user reviews and their experiences.
You can collect the survey data from the customers or users those are existing users in the salesforce org. After that you can create the reports and dashboards of data collects on the Survey responses object.
You can also share insights with your company.
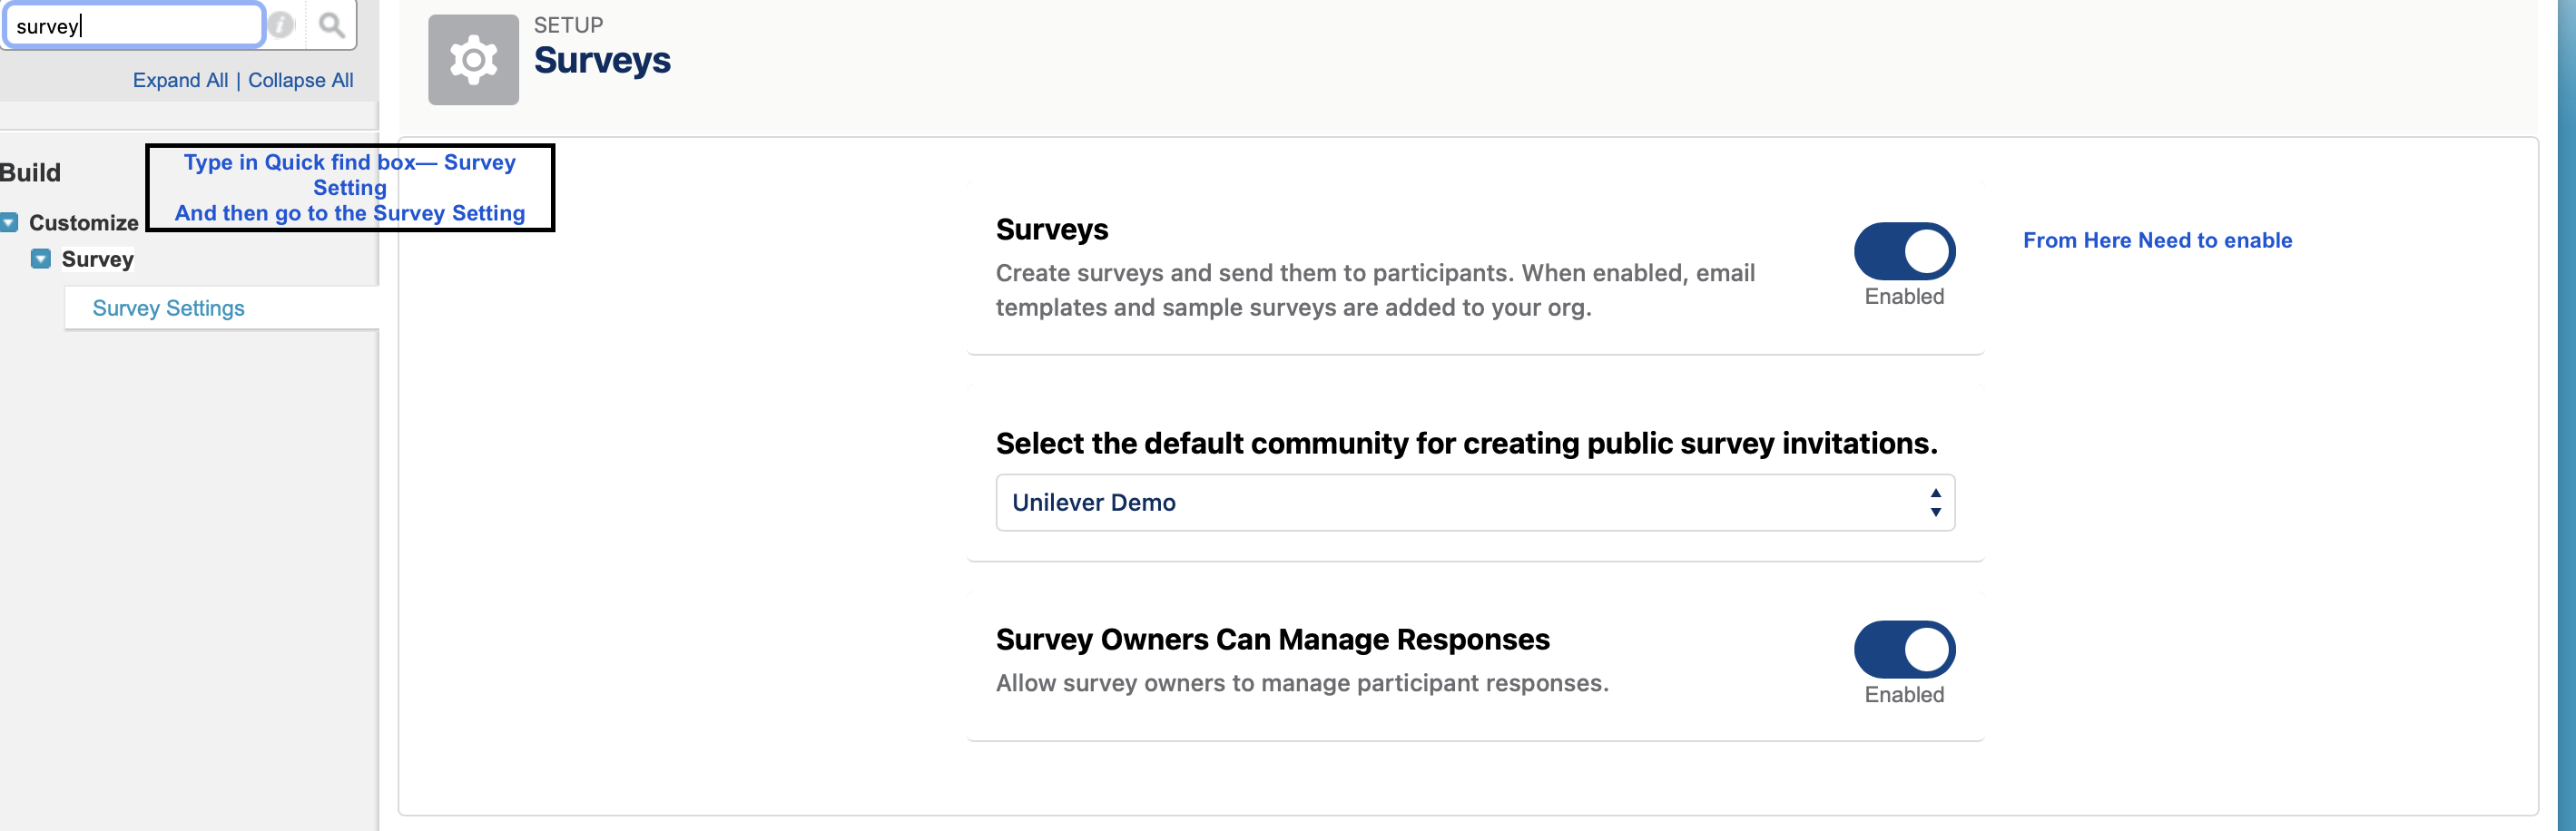
Some Pre-Requisite of the Survey:
- Check and enable the Community in your org.
- Create the Community.
- Check and enable Survey in your org from the Setup go the Survey Setting.
- Last step select the Domain for which we are created the Community.
5. After you enable the Survey Std. object create then you need to drag and drop the Survey object and create the tab in the app in which you wants to access the Survey.
Let’s begin with how to create the Survey:
- Click on the Survey Tab and click on the “New Button” to open the Survey Builder.
- As per your use case give the title of the Survey Page.
- Then you need to create a “Welcome page” and if you want to add any image you can add an image also for the background in the welcome page. This is the same for the “Thank You” page.
- To add the question on the Survey Page click on the “Add Page”.


After that, you can preview the Survey before activating the survey. Click on the “Preview” button and if you think you want to further add any questions or any changes required you can edit the survey and then in the end “Activate” the survey.
After activating the survey, we can send the survey to the customers or users to collect the customer data. We can send the survey to the participants by generating the link with the click of the “Send” button. You would receive two options “Get Invitation ” and the “Send Email” button.
Then View the Result of Survey:
We can view the results of the Survey by click on the “Analyze” button. It gives you the ability to see the responses against each questions.
Let us know in the comment section if this component helps you out. !!
If you want to add anything in this component further Chat with us, We will be more than happy to assist you.
And thank you for being an awesome readers!


Recent Comments